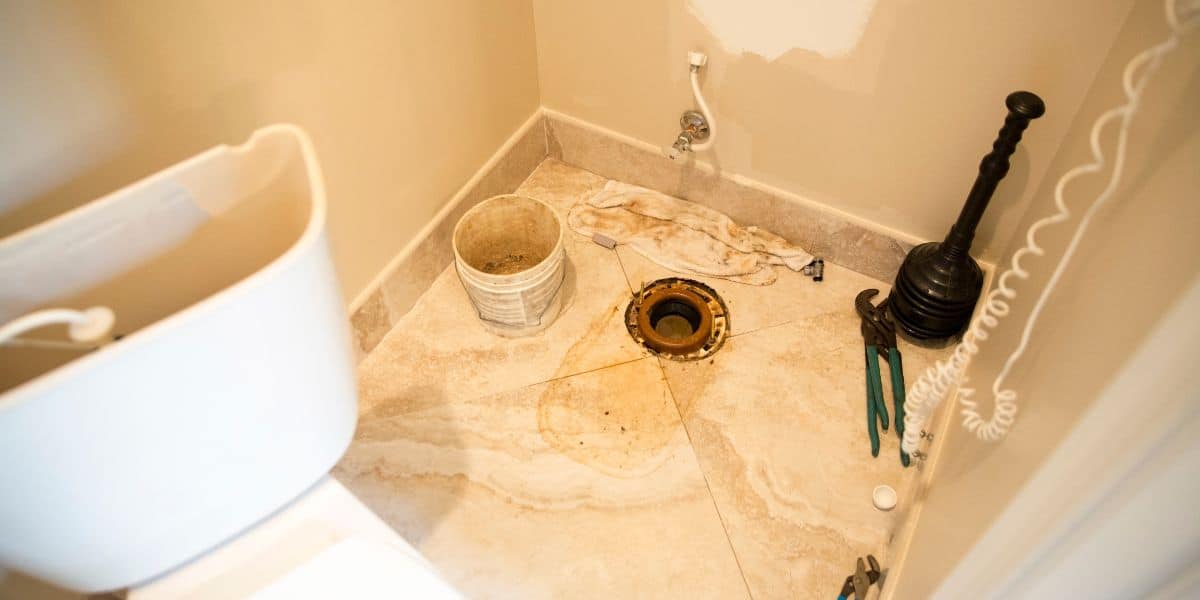
Installing a toilet flange may not be the most glamorous DIY project, but it’s a crucial one for maintaining a functional and leak-free bathroom. The toilet flange, also known as a closet flange, is the pipe fitting that connects your toilet to the sewer line. It provides a secure and watertight seal, preventing unpleasant leaks and ensuring your bathroom remains a comfortable and hygienic space. Whether you’re renovating your bathroom or dealing with a broken flange, this step-by-step guide will walk you through the process of installing a toilet flange like a pro.
Table of contents
Tools and Materials
Before you begin, it’s essential to gather all the necessary tools and materials to ensure a smooth installation process. Here’s a list of what you’ll need:
Tools:
- Adjustable wrench
- Hacksaw or reciprocating saw
- Screwdriver
- Plumber’s putty
- Plunger (optional, for removing water from the toilet bowl)
Materials:
- New toilet flange
- Wax ring
- Closet bolts with nuts and washers
- PVC primer and cement (if using a PVC flange)
- ABS primer and cement (if using an ABS flange)
- Teflon tape
Preparations
Before you start any DIY project, safety should be your top priority. Ensure that you have turned off the water supply to the toilet and have safely disconnected it from the water source. If there is any water left in the toilet bowl or tank, use a plunger or sponge to remove it.
Next, remove the decorative caps covering the closet bolts on the base of the toilet. These bolts secure the toilet to the flange and the floor. Loosen and remove the nuts and washers from the closet bolts, keeping them aside for later.
Removing the Old Flange
Removing the old flange can be a challenging task, especially if it’s corroded or stuck. Follow these steps to get the job done:
a. Cut the Waste Pipe: Use a hacksaw or reciprocating saw to carefully cut the waste pipe just below the existing flange. Be cautious not to damage the surrounding floor or the toilet drain line.
b. Remove the Old Flange: Once the waste pipe is cut, you should be able to remove the old flange. If it’s stubbornly stuck, use a screwdriver or chisel to carefully pry it up. Be patient and gentle to avoid damaging the sewer line.
c. Clean the Area: After removing the old flange, clean the area around the sewer pipe to ensure a smooth and level surface for the new flange.
Installing a New Flange
Now that you’ve successfully removed the old flange, it’s time to install the new one. The type of flange you use (PVC or ABS) will depend on your plumbing system. Here’s how to proceed with the installation:
a. Apply Primer and Cement (PVC/ABS Flange): If you’re using a PVC or ABS flange, apply primer to the inside of the flange and the outside of the waste pipe. Then, apply PVC cement to both surfaces. Quickly insert the flange onto the waste pipe, ensuring it’s properly aligned.
b. Secure the Flange: With the flange in place, use screws or bolts to secure it to the floor. Make sure it’s level and snug.
c. Use a Wax Ring: Place a wax ring onto the flange. This wax ring will create a watertight seal between the toilet and the flange. Some wax rings come with a plastic horn that should be facing up.
Securing the Toilet
With the new flange securely in place, it’s time to reattach the toilet. Follow these steps:
a. Align the Toilet: Carefully align the toilet’s mounting holes with the closet bolts on the flange. Lower the toilet bowl onto the wax ring and closet bolts. Apply gentle pressure to compress the wax ring and create a tight seal.
b. Secure the Toilet: Place washers and nuts onto the closet bolts and tighten them evenly using an adjustable wrench. Be cautious not to overtighten, as this could crack the toilet’s base.
c. Cut Excess Bolt Length: If the closet bolts protrude above the nuts, use a hacksaw to cut off the excess length.
d. Reconnect the Water Supply: Reconnect the water supply line to the fill valve on the bottom of the toilet tank. Hand-tighten the nut and then give it a quarter turn with your wrench.
Final Checks and Tips
Before you celebrate your successful toilet flange installation, perform these final checks and consider these tips:
a. Flush and Check for Leaks: Turn on the water supply and flush the toilet. Check around the base of the toilet for any signs of leaks. If you notice any, tighten the closet bolts slightly.
b. Apply Teflon Tape: For added security, wrap Teflon tape around the threads of the closet bolts before attaching the nuts. This helps create a watertight seal.
c. Reinstall Decorative Caps: Place the decorative caps back onto the closet bolts to give your toilet a finished look.
d. Caulk Around the Base (Optional): Some people choose to apply a thin bead of caulk around the base of the toilet to create a seamless look and prevent dust and dirt from collecting in the gap. This step is optional but can add a polished finish to your installation.
Does a toilet flange need to be screwed to the floor?
Yes, a toilet flange does need to be screwed or securely fastened to the floor. The toilet flange, also known as the closet flange, is a crucial component of a properly functioning toilet installation. Here’s why it’s essential to screw the toilet flange to the floor:
- Stability and Support: The toilet flange serves as a mounting point for the toilet and provides stability and support to the toilet bowl. When the flange is securely anchored to the floor, it prevents the toilet from moving or rocking, which is essential for user comfort and safety.
- Watertight Seal: The wax ring, which is placed between the base of the toilet and the toilet flange, creates a watertight seal. When the toilet is properly secured to the flange, it compresses the wax ring, forming a seal that prevents water and sewer gases from escaping. If the flange is not securely fastened to the floor, this seal may be compromised, leading to leaks and odors.
- Prevention of Damage: If the flange is not securely attached to the floor, it can shift or move over time. This movement can cause damage to the wax ring, the toilet’s mounting bolts, and the surrounding flooring. It can also lead to leaks and potential costly repairs.
- Code Compliance: In many building codes and plumbing regulations, it is a requirement to secure the toilet flange to the floor using screws or bolts. Adhering to these codes ensures that your toilet installation is safe and meets the necessary standards.
When installing or reinstalling a toilet, it’s crucial to inspect the condition of the toilet flange and ensure that it is securely fastened to the floor. If you encounter a loose or damaged flange during a toilet removal or replacement project, it’s advisable to address this issue promptly by either tightening the existing screws or bolts or replacing them as needed. A properly secured toilet flange is essential for the overall performance and longevity of your toilet installation.
Conclusion
Congratulations! You’ve successfully installed a toilet flange and ensured a secure and leak-free connection between your toilet and the sewer line. This essential DIY project not only prevents unwanted leaks but also contributes to the overall functionality and cleanliness of your bathroom.
Remember that safety and patience are key throughout the process. If you encounter any difficulties or are uncomfortable with any step, it’s always a good idea to consult with a professional plumber. With the right tools, materials, and a bit of know-how, you can tackle this DIY project and enjoy a well-functioning bathroom for years to come.


